Whether you're a tech enthusiast, a developer, or someone managing IoT devices, this article will provide you with the tools and knowledge you need to overcome common obstacles. By following the methods outlined here, you'll be able to remotely SSH into your Raspberry Pi, even when it's behind a firewall, using your Windows machine.
Accessing a Raspberry Pi remotely is essential for managing projects, running scripts, or troubleshooting issues without needing physical access to the device. However, firewalls often block incoming SSH connections, making it difficult to establish a direct link. Fortunately, there are proven techniques and tools that allow you to bypass these restrictions while maintaining a secure connection. This guide will explore various methods, such as port forwarding, reverse SSH tunnels, and third-party services, to help you achieve seamless remote access.
In this article, we'll dive deep into the process of remotely SSHing into a Raspberry Pi behind a firewall using Windows. You'll learn step-by-step instructions, troubleshooting tips, and best practices to ensure a smooth experience. By the end of this guide, you'll have the confidence to manage your Raspberry Pi remotely, no matter where it's located. Let's get started and unlock the full potential of your Raspberry Pi!
Read also:Bailey Brooke A Comprehensive Guide To Her Life And Career
Table of Contents
- Why Is Remote SSH Access Important?
- How to Remotely SSH Raspberry Pi Behind Firewall on Windows?
- What Are the Best Tools for SSH Access?
- Can You Use Port Forwarding for Raspberry Pi?
- How to Set Up a Reverse SSH Tunnel?
- Is It Secure to SSH Raspberry Pi Behind Firewall on Windows?
- What Are the Common Issues and How to Fix Them?
- How to Use Third-Party Services for Remote Access?
- Why Should You Use SSH Keys for Authentication?
- Final Thoughts on Remotely SSH Raspberry Pi Behind Firewall on Windows
Why Is Remote SSH Access Important?
Remote SSH access is a crucial skill for anyone managing Raspberry Pi devices. It allows you to control your device from anywhere in the world, making it ideal for IoT projects, server management, and remote troubleshooting. With SSH, you can execute commands, transfer files, and monitor system performance without needing physical access to the device. This flexibility is especially valuable when your Raspberry Pi is located behind a firewall, as it enables you to bypass network restrictions and maintain control.
For Windows users, remotely accessing a Raspberry Pi behind a firewall can seem daunting. However, with the right tools and techniques, it becomes a straightforward process. By leveraging SSH, you can ensure that your Raspberry Pi remains accessible and secure, even in challenging network environments. This section will explore the importance of SSH and why it's a must-have skill for Raspberry Pi enthusiasts.
How to Remotely SSH Raspberry Pi Behind Firewall on Windows?
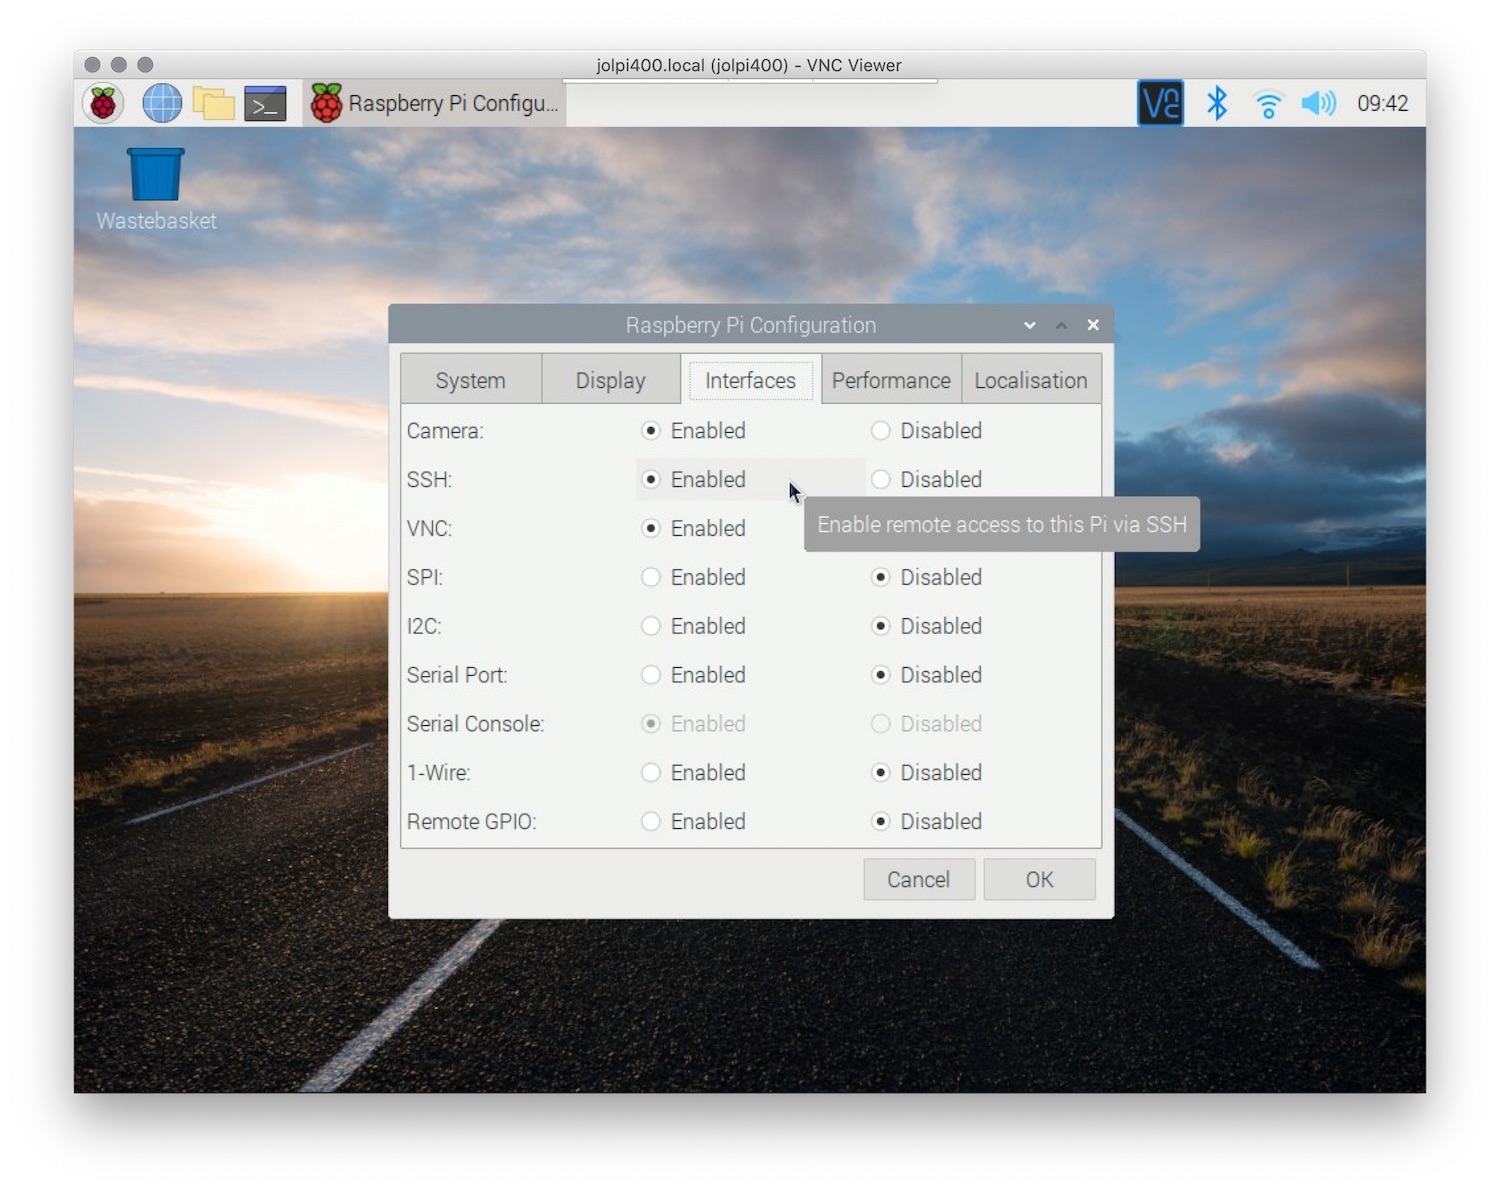
To remotely SSH into a Raspberry Pi behind a firewall using Windows, you'll need to follow a series of steps. First, ensure that your Raspberry Pi is configured to accept SSH connections. This involves enabling SSH in the Raspberry Pi settings and ensuring that the device has a stable internet connection. Next, you'll need to address the firewall restrictions that may block incoming SSH traffic.
One effective method is to use port forwarding on your router. By redirecting traffic from a specific port to your Raspberry Pi's local IP address, you can bypass the firewall and establish a connection. Alternatively, you can set up a reverse SSH tunnel, which allows the Raspberry Pi to initiate the connection to your Windows machine. This approach is particularly useful when you don't have control over the firewall settings.
What Are the Best Tools for SSH Access?
When it comes to remotely accessing your Raspberry Pi, having the right tools can make all the difference. Popular SSH clients for Windows include PuTTY, MobaXterm, and Windows Subsystem for Linux (WSL). Each of these tools offers unique features that can enhance your SSH experience.
- PuTTY: A lightweight and easy-to-use SSH client that supports key-based authentication.
- MobaXterm: A feature-rich tool that combines SSH with additional utilities like file transfer and terminal multiplexing.
- WSL: Allows you to run Linux commands directly on Windows, providing a seamless SSH experience.
Can You Use Port Forwarding for Raspberry Pi?
Port forwarding is a common technique used to remotely access devices behind a firewall. By configuring your router to forward traffic from a specific port to your Raspberry Pi's local IP address, you can bypass firewall restrictions and establish an SSH connection. However, this method requires access to your router's settings and a static IP address for your Raspberry Pi.
Read also:Maximize Your Feedback Mcdonalds Survey Form Online Guide
To set up port forwarding, log into your router's admin panel and locate the port forwarding section. Create a new rule that maps an external port (e.g., 2222) to your Raspberry Pi's local IP address and port 22 (the default SSH port). Once configured, you can use your public IP address and the external port to connect to your Raspberry Pi from anywhere.
How to Set Up a Reverse SSH Tunnel?
A reverse SSH tunnel is an alternative method for remotely accessing your Raspberry Pi behind a firewall. Instead of relying on port forwarding, this approach allows the Raspberry Pi to initiate the connection to your Windows machine. This is particularly useful when you don't have control over the firewall settings or when port forwarding is not an option.
To set up a reverse SSH tunnel, you'll need to install an SSH client on your Windows machine and configure the Raspberry Pi to connect to it. Use the following command on the Raspberry Pi: ssh -R 2222:localhost:22 user@your-windows-ip. This command creates a tunnel that forwards traffic from port 2222 on your Windows machine to port 22 on the Raspberry Pi. Once the tunnel is established, you can use your SSH client to connect to localhost on port 2222.
Is It Secure to SSH Raspberry Pi Behind Firewall on Windows?
Security is a top priority when remotely accessing your Raspberry Pi. While SSH is a secure protocol, there are additional measures you can take to protect your device. For example, using SSH keys instead of passwords provides an extra layer of security. SSH keys are nearly impossible to brute-force, making them a safer option for authentication.
Another important step is to change the default SSH port (22) to a non-standard port. This reduces the risk of automated attacks targeting the default port. Additionally, ensure that your Raspberry Pi is running the latest software updates and that your firewall is properly configured to block unauthorized access.
What Are the Common Issues and How to Fix Them?
While remotely SSHing into a Raspberry Pi behind a firewall on Windows is generally straightforward, you may encounter some common issues. These include connection timeouts, authentication failures, and incorrect port configurations. Below are some troubleshooting tips to help you resolve these problems:
- Connection Timeout: Ensure that your Raspberry Pi is connected to the internet and that the SSH service is running.
- Authentication Failure: Double-check your username and password or SSH key configuration.
- Incorrect Port Configuration: Verify that the correct port is being used and that port forwarding is properly set up.
How to Use Third-Party Services for Remote Access?
If port forwarding and reverse SSH tunnels are not feasible, you can use third-party services to remotely access your Raspberry Pi. Services like Ngrok, Dataplicity, and ZeroTier provide secure and easy-to-use solutions for bypassing firewalls. These services typically require minimal configuration and offer additional features like web-based access and device management.
For example, Ngrok allows you to create a secure tunnel to your Raspberry Pi by running a simple command. Once the tunnel is established, you can access your device using a public URL provided by Ngrok. Similarly, Dataplicity offers a web-based interface for managing your Raspberry Pi, making it an excellent choice for beginners.
Why Should You Use SSH Keys for Authentication?
Using SSH keys for authentication is a best practice for securing your Raspberry Pi. Unlike passwords, SSH keys are nearly impossible to guess or brute-force, providing a higher level of security. Additionally, SSH keys eliminate the need to enter a password every time you connect, making the process more convenient.
To generate an SSH key pair, use the ssh-keygen command on your Windows machine. Once the keys are generated, copy the public key to your Raspberry Pi using the ssh-copy-id command. This will allow you to authenticate using the private key stored on your Windows machine.
Final Thoughts on Remotely SSH Raspberry Pi Behind Firewall on Windows
Remotely accessing your Raspberry Pi behind a firewall on Windows is a valuable skill that can enhance your ability to manage IoT projects, servers, and other devices. By following the methods outlined in this guide, you can overcome common obstacles and establish a secure connection. Whether you choose to use port forwarding, reverse SSH tunnels, or third-party services, the key is to prioritize security and convenience.
Remember to regularly update your Raspberry Pi's software, use strong authentication methods, and monitor your network for potential threats. With these practices in place, you'll be able to remotely SSH into your Raspberry Pi with confidence and ease. Start exploring the possibilities today and unlock the full potential of your Raspberry Pi!